Macarons are delicious and make for great presentation but the cookies are pretty temperamental. They're made from simple ingredients so it's really about the execution I think. There are so many different ways to go with the flavor combinations, which is awesome.
The thing that really overwhelmed me when I first started out making them was the millions of ways to use the ingredients. To age the egg whites or not and how long? Pre-ground almond flour or grind it yourself? Is it necessary to weigh your ingredients? Hand mixer or the trusty KitchenAid? Italian method or French? Oven temperatures? The list went on and I started to psyche myself out. Not good. I'll stop rambling now so we can get on with it.
So, the recipe:
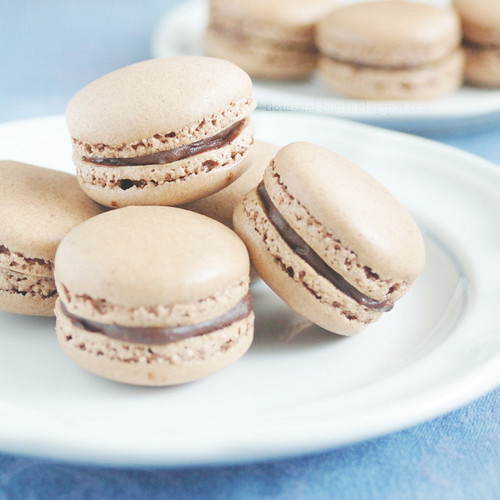
Chocolate Macarons
makes 16
3/4 cup almond flour (ground almonds)
scant 1 cup confectioner's sugar
2 large egg whites
1/4 cup granulated sugar
2 Tbsp unsweetened cocoa powder
Filling:
3.5 oz. semi-sweet chocolate or bittersweet
2/3 cup heavy cream
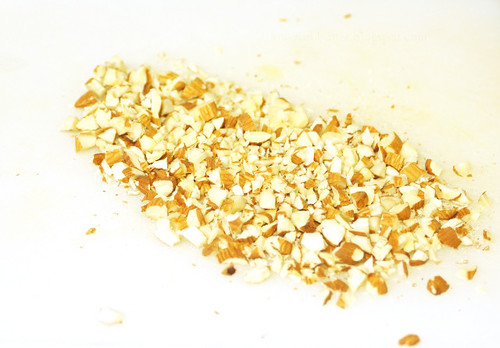
I used whole almonds so I chopped them up before grinding them. If you're using chopped or slivered almonds, stick them in a food processor or something to grind them up. I used a small spice grinder. The idea is to grind them to a flour, not a paste.
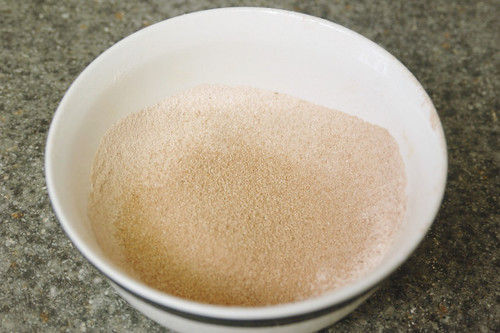
Sift the almond flour, confectioner's sugar, and cocoa powder together.
Separate your eggs. If any yolk gets into the whites they will not whip. Lots of recipes I've read call for aging your egg whites but I didn't do that. I took mine straight out of the fridge and whipped them cold.
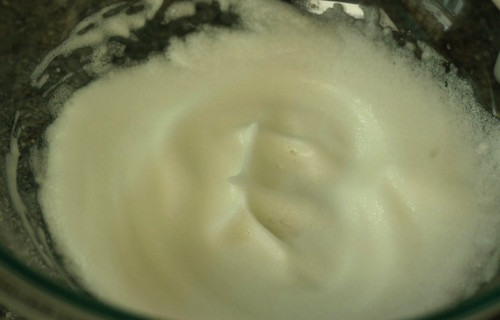
Beat the egg whites till soft peaks form.
When you've reached soft peaks, gradually add the granulated sugar. Then continue beating the mixture until you reach a firm, glossy meringue.
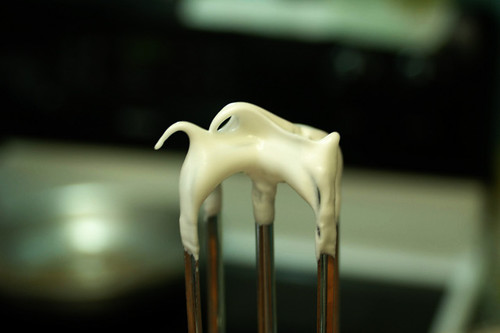
Also, you can turn the bowl upside down and the whites will defy gravity!
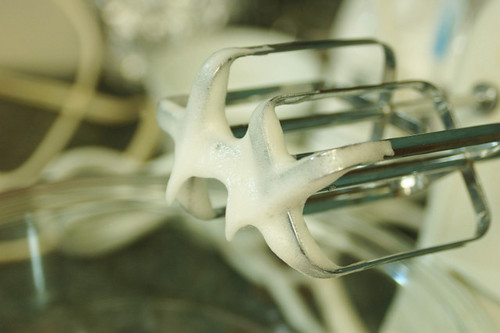
When the you scrape the beaters off, the egg whites will just sit there on top of the meringue. They will not disappear into the rest of the mixture.
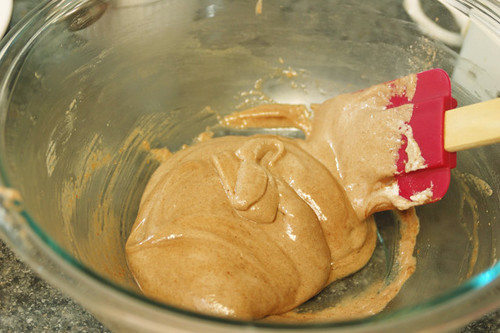
Just a few more folds and the batter is ready.
Add in 1/3 of the dry ingredients and fold them in with a spatula. Fully incorporate it and then add another third in. Finally, add the last of it. Use it all - it may look impossible at first, but keep going. If you don't use all of it, the dry to wet ratio of ingredients will be messed up.
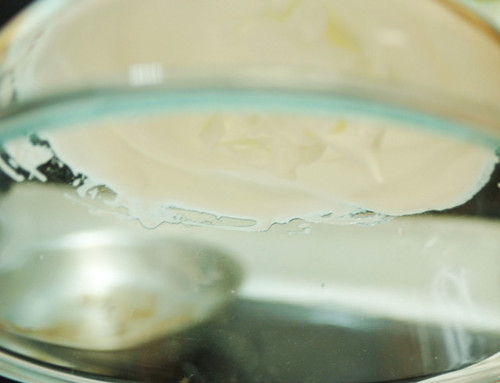
I've heard the proper batter described as a mixture that "flows like magma" or has a "shiny, ribbon-like consistency". Seems fairly accurate, I guess, since I've never been remotely near flowing magma. When you lift your spatula a thick ribbon should fall slowly into the bowl and disappear within 30 seconds.
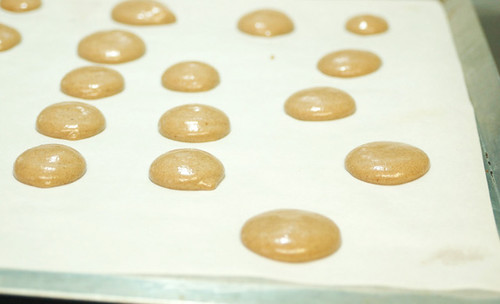
My piping skills are kind of rusty.
Place the batter into a pastry bag or a Ziploc bag with the corner cut off and a plain tip inserted. Pipe rounds onto a Silpat or parchment paper.
Some people just pop their macarons into an oven at this point. When I tried that, the smooth tops broke. So I let them rest for 30 minutes. You should be able to lightly touch one without the batter sticking to your finger.
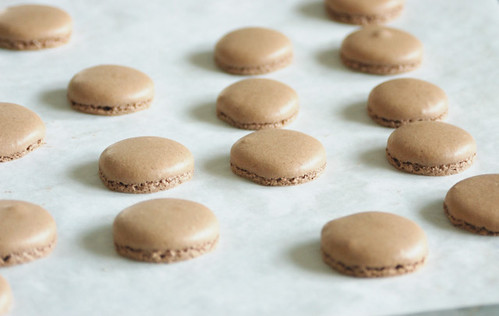
I think it really depends on your oven at this point. Some run hot, some cooler. It took some real trial-and-error (heavy on the error) to get to the point where I finally got my shells to look like the ones in the picture.
I baked them at 290F for five minutes, then reduced the temperature to 280F and let them bake for 12 minutes more. That's a big difference from the 325F my recipe called for. So it could be anywhere from 280F-325F for your oven.
After letting cool for about 5-7 minutes, carefully pry the shells off the paper. Completely cool - fill with ganache.
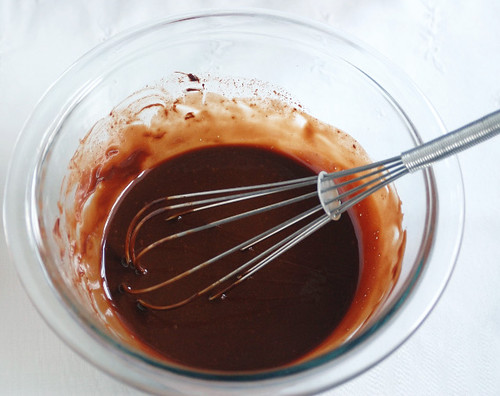
Place chocolate in heatproof bowl. Heat cream in saucepan till just boiling and pour over chocolate. Stir until smooth and use to sandwich the macaron shells together.
Don't be discouraged if the macarons don't work out the first time. I used to have stacks and stacks of GLAD containers with fail macarons in them. Seriously. Really though, these are so worth it once you get the hang of it. It's so satisfying to take a bite and know you created this with your own two hands. You will impress everyone with your little sandwich cookies.
Or: Omit cocoa powder for plain shells.
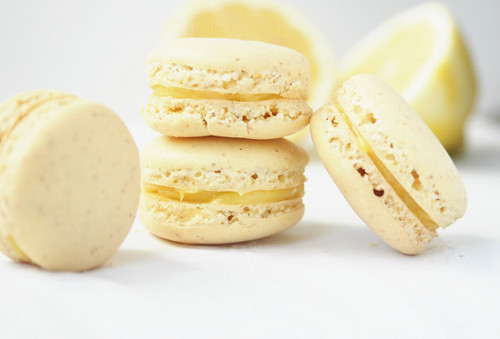
Lemon Macarons: add some yellow food coloring and zest of one lemon to batter and fill with lemon curd.
Finally, after a long winded post, I am leaving you with some ways to use all of those egg yolks. I nearly went crazy with the amount of egg yolks left after all those batches of macarons I made. You'd have thought I made a few angel food cakes or something.
Creme Brulee
Lemon Curd
Ice Cream
Béarnaise Sauce
Mousse